
Over the years I have crocheted pumpkin garlands for Halloween and Christmas tree garlands for Christmas, as well as an assortment of decorations such as Brussels sprouts, mini Christmas trees and Christmas puds!
This year I have decided to make a Christmas wreath garland. Read on for a step by step guide to making your own Christmas wreath garland.


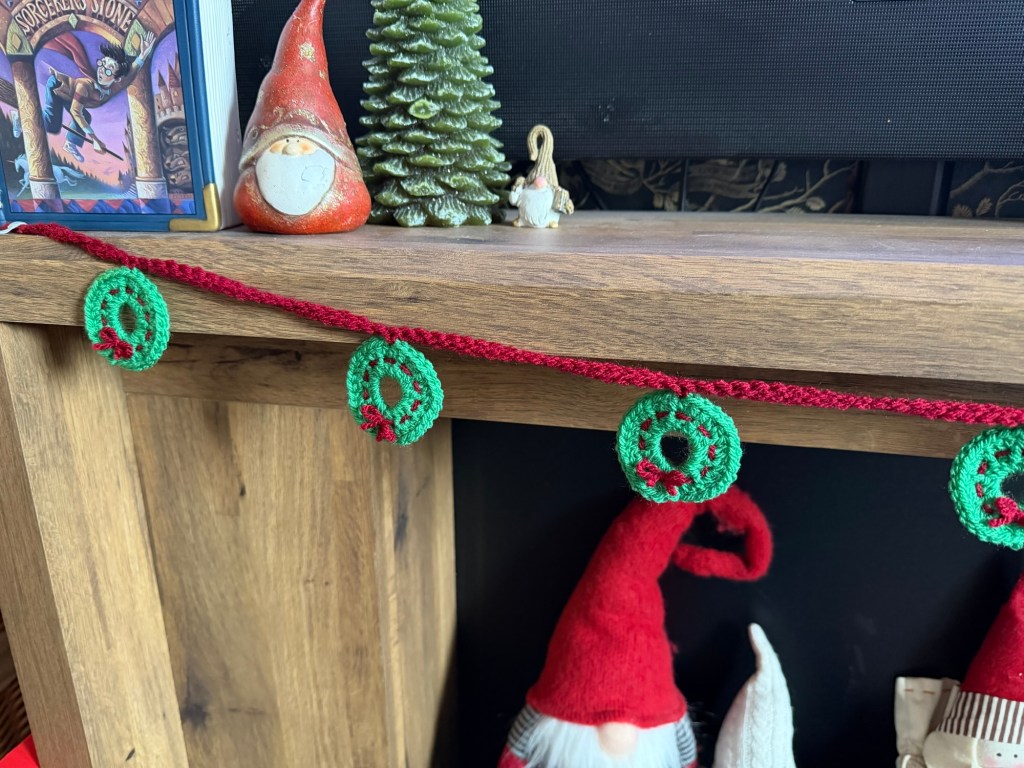
The garland is really easy to make whether you are a beginner or experienced. Throughout the tutorial I use American terms for the crochet stitches.
I used a size 4 hook and some DK yarn from my stash in claret (for the bows) and green (for the wreath). You will also need a darning needle and a pair of scissors.
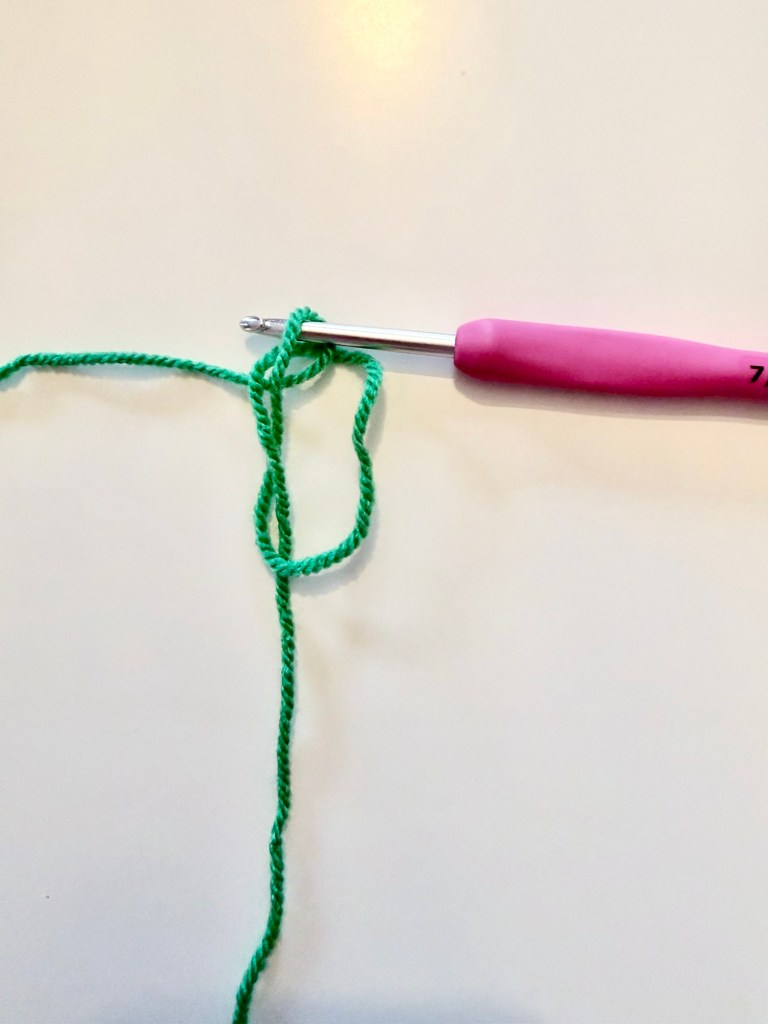
To begin, I made a magic circle in my chosen wreath colour.
I then crocheted 20 half double crochet (HDC) into the magic circle, joining the last HDC into the first HDC with a slip stitch.
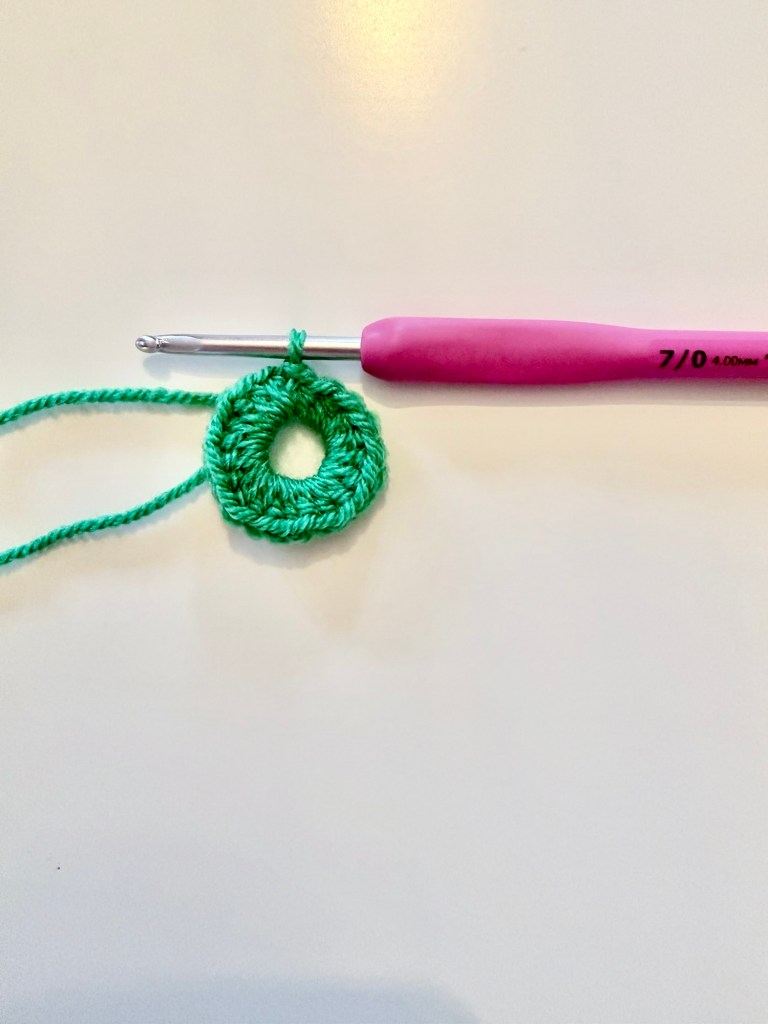
The next, and final, round alternates each stitch – in the first stitch (the stitch you have just put a slip stitch into), work a HDC and in the next stitch work 2 HDC. Continue in this way until the end of the round, joining the last stitch into the first with a slip stitch.
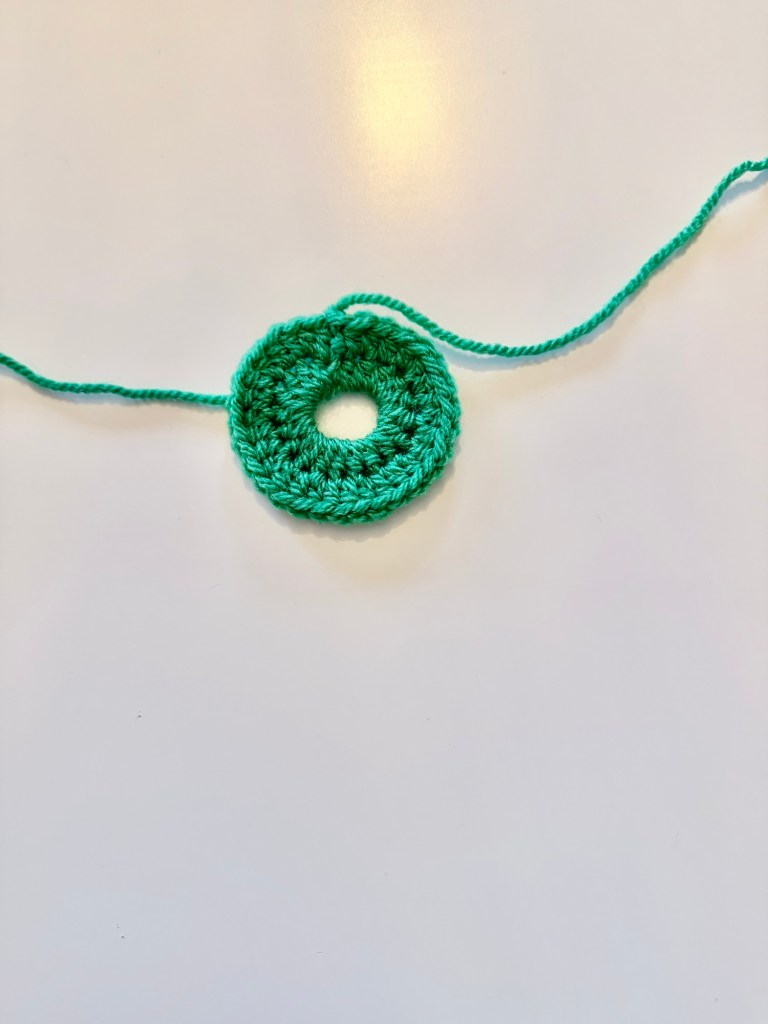
I made 7 wreaths for my garland. Once you have completed the wreath, darn in your ends as we don’t want it to unravel!
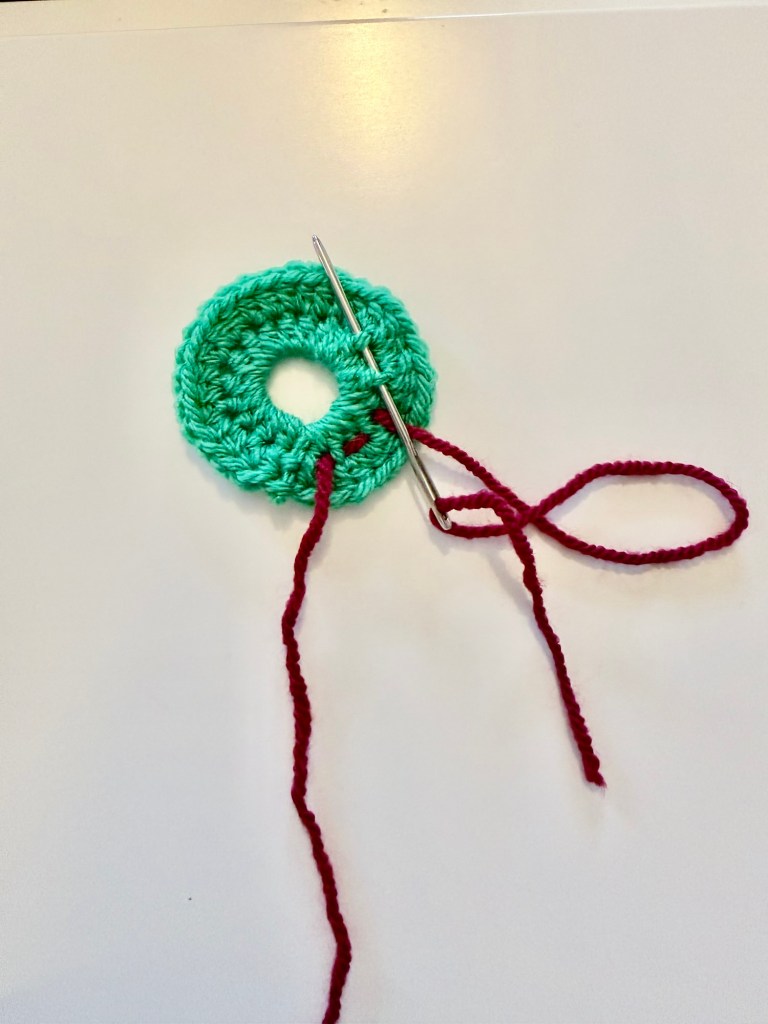
The next step is adding the bow detail to the wreaths. You will need a length of your desired yarn.

To add the bow detail insert your darning needle from the front between each stitch ensuring you have left a long tail to tie the bow at the end. Work in between each stitch all the way around until you reach the bottom of the wreath and then tie your bow.

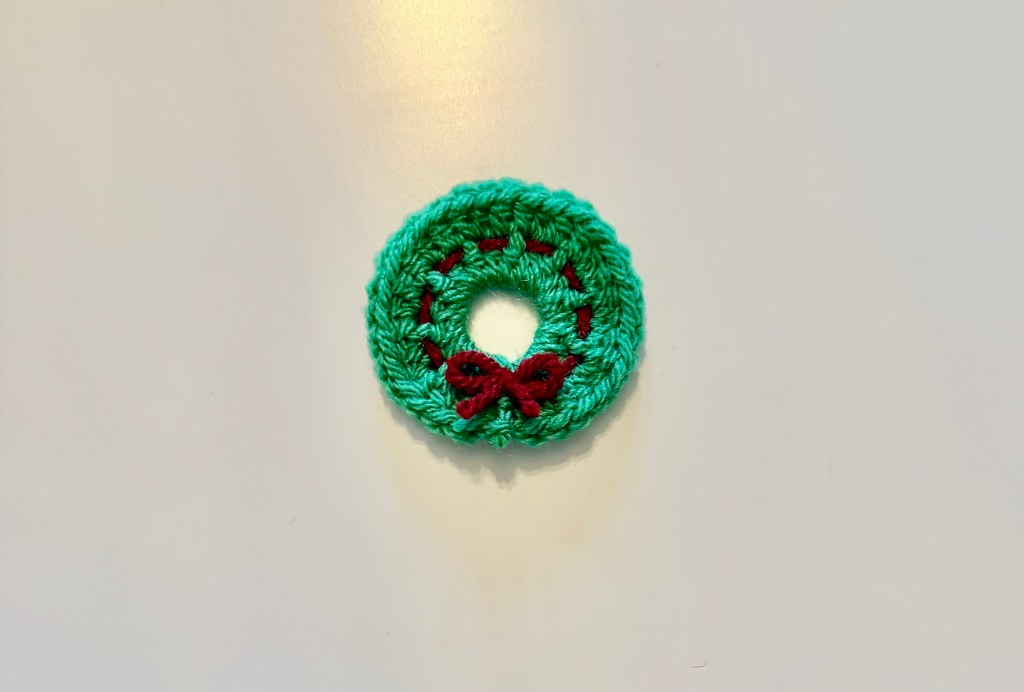
Your wreath is now complete! You can make as many of these as you like for your garland. Alternatively, you could add them as decorations to your tree or table!
Now for the garland!
I started by chaining 15 in my chosen colour (claret). At this point I added a stitch marker. I then added a stitch marker every 20 stitches. After placing the 7th stitch marker I chained a further 15 chains.
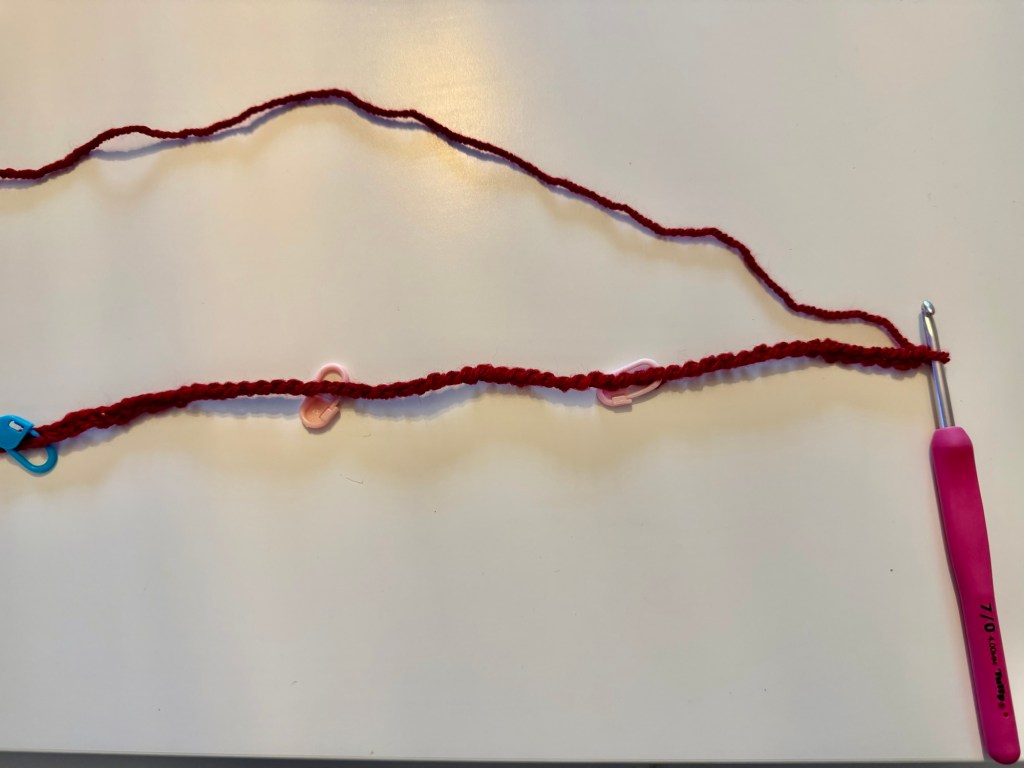
I then worked back down the chain with a single crochet (SC) in each chain adding the wreaths at every stitch marker.
To add the wreaths I SC through the chain and through the HDC stitch at the top of the completed wreath. Continue in this way until you reach the end of your chain.
And there you have it! A completed Christmas Wreath Garland!
Pattern
Round 1 – make a magic circle. Work 20 HDCs into the magic circle. Join to the first HDC with a slip stitch.
Round 2 – *HDC into the first stitch, 2 HDCs into the next stitch* repeat all the way around. Slip stitch into the first HDC to join.
Take a length of yarn in your desired colour and weave between the stitches from the front all the way around.
Tie a little bow and your wreath is complete!

Leave a comment